Getting Started: Setting Up Your First VPN
Setting up your first VPN is straightforward and takes just a few minutes. Most VPN services handle the technical complexity for you—downloading an app, entering your credentials, and clicking “connect” is usually all it takes. However, understanding what you’re doing and verifying that your VPN is working correctly helps you avoid common mistakes and get actual privacy value instead of false confidence.
This guide walks you through the general VPN setup process, how to verify it’s actually working, and common issues you might face. Device-specific setup instructions are available for your platform below—just pick your device type and follow the detailed guide.
Before You Start: What You Need
Before downloading anything, have these ready:
| A VPN subscription | You’ve already chosen and purchased/signed up with a VPN provider. You should have login credentials (username/email and password). |
|---|---|
| Your device | The device you want to protect (computer, phone, tablet). |
| Internet connection | Obviously, you need internet to download the VPN app and connect. |
| 10-15 minutes | Installation and basic setup is quick, but don’t rush it. |
If you haven’t chosen a VPN provider yet, check your provider’s website. Most have a “Download” or “Get Started” button prominently displayed with links for different devices.
💡 Always use official sources
Download VPN apps only from official sources: your VPN provider’s website, the official app stores (Apple App Store, Google Play, Microsoft Store), or links directly from your provider. Never download from third-party sites—compromised versions exist.
Setup Instructions by Device
VPN setup is similar across all devices, but specific steps vary by operating system. Choose your device type below for detailed, step-by-step instructions tailored to your platform:
| How to Set Up VPN on Windows - Devices using vpn on windows | Installation, login, and connection on Windows computers. Includes troubleshooting Windows Defender warnings and firewall integration. |
|---|---|
| How to Set Up VPN on macOS - Devices using vpn on macos | Installation via App Store or direct download, permission granting, and connection on Mac computers. Covers both Intel and Apple Silicon Macs. |
| How to Set Up VPN on iPhone and iPad - Devices using vpn ios iphone ipad | App Store installation, iOS permission handling, and connection on Apple mobile devices. Includes settings for optimal mobile VPN experience. |
| How to Set Up VPN on Android Devices - Devices using vpn on android devices | Google Play installation, Android permissions, and connection setup. Works on most Android phones and tablets. |
Each guide walks through installation, login, initial server selection, and verification that your VPN is working correctly on that specific platform. If you’re setting up on multiple devices, follow the relevant guide for each one.
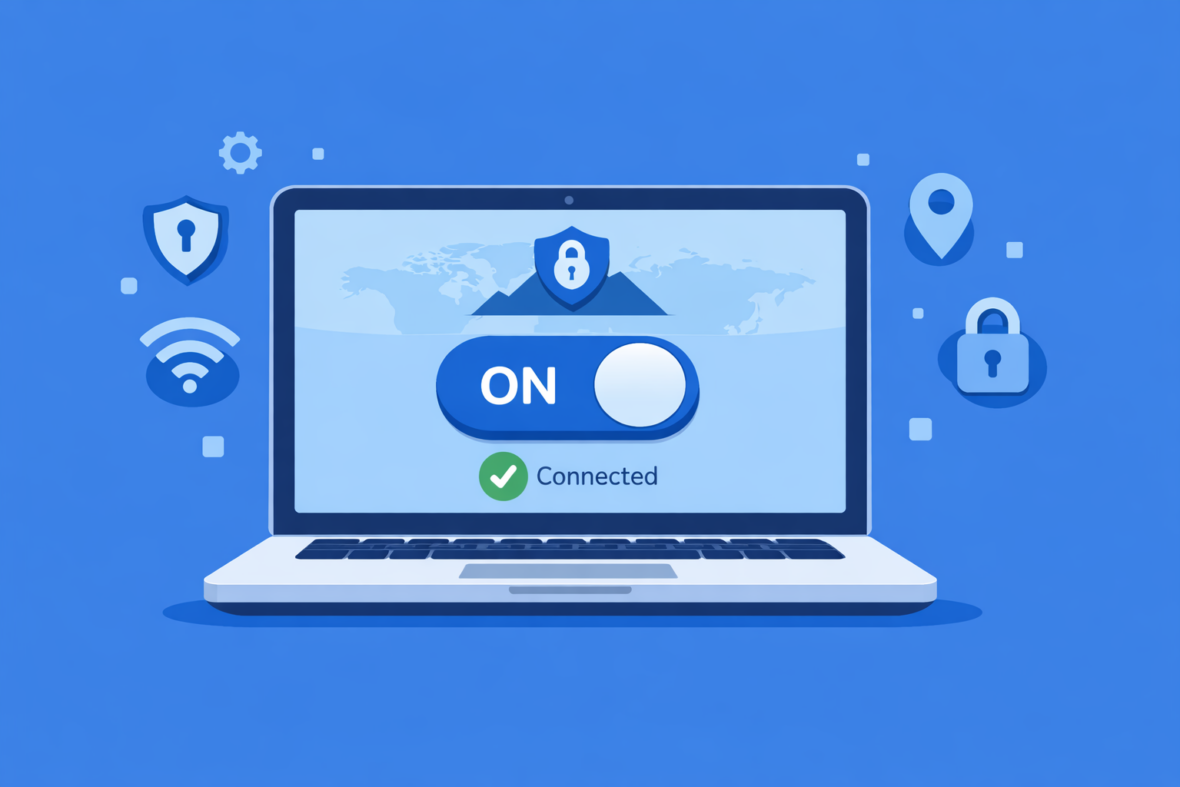
Verify Your VPN Is Actually Working
After connecting, don’t just assume it’s working. Verify that your VPN is actually protecting you and configured correctly.
- Check connection status: Your VPN app should show “Connected” status. Your device should show a VPN indicator (icon in status bar, VPN label in settings).
- Check your IP address: Open a web browser and go to ipleak.net. The displayed IP address should match your VPN server’s location, not your home location. If it shows your home city, your VPN isn’t masking your IP.
- Check for DNS leaks: On ipleak.net, look at “DNS Servers” section. It should show your VPN provider’s DNS servers, not your ISP’s. If you see your ISP’s DNS, you have a DNS leak.
- Test speed: Visit speedtest.net and run a speed test while connected to VPN. Note the speed. This gives you a baseline for VPN performance.
If all checks pass (right IP, right DNS servers, reasonable speed), your VPN is working correctly. If not, see the troubleshooting section below.
💡 What's normal
Some speed reduction (10-30%) is normal with VPN. Your IP should match the VPN server location, not your actual location. DNS should show VPN provider’s servers.
First Steps After Connecting: Basic Settings
Once you’ve verified your VPN is working, spend a few minutes adjusting settings to match your needs.
Enable kill switch (if available): This setting disconnects your internet if the VPN connection drops, preventing accidental unprotected traffic. Find this in Settings → Security or Privacy. Enable it unless you have a specific reason not to.
Choose your preferred server: Most VPN apps default to “Fastest Server” or “Recommended.” If you want consistent performance or access to content in a specific region, pick a specific server and save it as default. Many apps let you “favorite” servers.
Set auto-connect (optional): Some VPNs offer auto-connect on app launch or when connecting to Wi-Fi. This means VPN connects automatically without you clicking anything. Useful for convenience, but not required.
Review privacy settings: Check your app’s settings for any additional privacy options (DNS leak protection, IPv6 disabling, split tunneling). Most defaults are fine for beginners, but explore if you’re curious.
Don’t change protocol (yet): Your VPN app likely defaults to WireGuard or OpenVPN. Beginners should stick with defaults. Only switch protocols if you experience connection issues and your provider suggests trying a different one.
💡 Avoid split tunneling if unsure
Split tunneling routes some traffic through VPN and some traffic directly. Beginners shouldn’t enable this unless you specifically need it, as it can accidentally leak unprotected data.
Daily Usage: Connecting and Disconnecting
Once setup is complete, using VPN is simple and becomes routine.
Connecting: Open your VPN app and click “Connect.” It takes 2-5 seconds typically. You’ll see a status change and may see a notification. That’s it.
Disconnecting: Click “Disconnect” in your VPN app. Your device returns to normal internet (unencrypted, using your ISP’s DNS). If you have kill switch enabled, internet disconnects if VPN drops unexpectedly, so you don’t accidentally use unprotected internet.
Reconnecting to different servers: You can change servers anytime. Select a new server in your app’s server list and click “Connect.” Switching servers takes 5-10 seconds. Your connection will briefly drop and reconnect with the new server.
Using VPN across devices: If you’ve installed VPN on multiple devices (phone, laptop, tablet), each connection uses one of your allowed simultaneous connections. Most VPN providers allow 5-6 simultaneous connections, so you can protect multiple devices at once.
Common First-Time Issues and Quick Fixes
| Problem | Cause | Quick fix |
|---|---|---|
| App won’t connect | Server busy, network issue, wrong credentials | Try different server, restart app, restart device, verify login info |
| Very slow internet | Distant VPN server, server congestion, protocol mismatch | Try nearby server, change protocol, run speed test to verify |
| Can’t access some websites | Website blocking VPN, geo-restriction issue, DNS problem | Try different VPN server, disable VPN temporarily, check website status |
| VPN keeps disconnecting | Network instability, firewall blocking, server issues | Try different server, restart app and device, check firewall settings |
| DNS leak detected | App misconfiguration, DNS not forced through VPN | Restart app, update app to latest version, check DNS settings in app |
| App won’t install | Permission issues, insufficient storage, corrupted download | Check permissions, free up storage space, download from official source again |
Most issues resolve by trying a different server or restarting the app/device. If problems persist, check your VPN provider’s support page or contact support directly—they can usually diagnose the issue quickly.
Troubleshooting Connection Problems
If your VPN isn’t connecting or is unreliable, work through these steps systematically.
Step 1: Verify your internet works without VPN. Disconnect VPN and open a website. If internet doesn’t work, the problem is your network, not the VPN. Fix your internet first.
Step 2: Try a different VPN server. Open your VPN app and select a completely different server (different country if possible). Some servers are busy or overloaded. A different server often fixes connection issues.
Step 3: Restart the VPN app. Close the app completely (don’t minimize, actually quit/force-stop). Wait 10 seconds. Reopen and try connecting. This clears temporary glitches.
Step 4: Restart your device. Power your device completely off. Wait 30 seconds. Power back on. Try VPN again. This clears system-level networking issues.
Step 5: Check firewall or antivirus. If you have firewall software (Windows Defender, third-party antivirus), it may be blocking the VPN. Try temporarily disabling it to test. If VPN works with firewall off, add the VPN app to your firewall’s whitelist.
Step 6: Update the app. Check your app store (App Store, Play Store, Microsoft Store) for updates. Newer versions often fix connectivity bugs. Update and try again.
Step 7: Try a different protocol. If your app offers multiple protocols (WireGuard, OpenVPN UDP, OpenVPN TCP), try switching to a different one. Some networks block certain protocols. Your provider’s support can advise.
If you’ve tried all steps and still can’t connect, contact your VPN provider’s support. Provide them with: your device type, app version, which servers you tried, any error messages, and which steps you’ve already attempted.
💡 Support is usually helpful
VPN providers have experienced teams that handle connection issues daily. They can often diagnose problems quickly if you provide clear information about what’s happening.
Important Security Notes for New VPN Users
Now that your VPN is set up, remember these important points to maintain privacy and security.
VPN doesn’t make you invisible. Websites can still identify you through your login accounts, cookies, and browser fingerprinting. Logging into your Gmail account while using VPN still shows Google who you are. VPN only hides your IP and masks your ISP’s view.
VPN doesn’t prevent malware. If you download malware or click dangerous links, VPN doesn’t protect you. Use antivirus software and good judgment as well.
VPN is not anonymity. If privacy from your ISP is your goal, VPN helps. If anonymity is your goal, you need more than just VPN. VPN providers can see your traffic (though they claim not to log it), so you’re shifting trust from your ISP to your VPN provider.
Keep your app updated. VPN providers release updates regularly with security patches and bug fixes. Enable auto-update in your app store settings or check manually monthly.
Use a strong password. Your VPN login credentials should be unique and strong. If someone accesses your VPN account, they can use it from anywhere. Use a password manager to store it securely.
💡 VPN is not a complete solution
VPN solves specific problems (ISP monitoring, public Wi-Fi eavesdropping, IP masking). It’s not a substitute for antivirus, strong passwords, or critical thinking about what you click.
Frequently Asked Questions: Getting Started with VPN
-
How long does VPN setup take?
Most of the time: 5-10 minutes from download to first successful connection. Installation is 2-3 minutes; login and connecting is 1-2 minutes; verification takes a few minutes. Beginners might take 15 minutes total, but it gets faster.
-
Do I need technical knowledge to set up VPN?
No. VPN apps are designed for non-technical users. If you can download an app and enter a password, you can set up VPN. The defaults are appropriate for most users.
-
Is it safe to download VPN from app stores?
Yes. Official app stores (Apple App Store, Google Play, Microsoft Store) verify apps before publishing. Download from app stores or your VPN provider’s official website. Avoid third-party sources.
-
Can I use VPN on multiple devices at once?
Yes, usually. Most VPN providers allow 5-6 simultaneous connections. You can install on your phone, laptop, and tablet and use all three at the same time. Check your provider’s limits.
-
Why is my VPN slow?
VPN adds some latency naturally (10-30% slower is normal). If it’s much slower, try a nearby server, switch protocols, or verify the server isn’t congested. Very slow speeds indicate a problem worth investigating.
-
Should I always keep VPN connected?
It depends on your threat model. Always-on VPN protects you everywhere but uses battery/data. Most users connect VPN when using public Wi-Fi or when concerned about ISP monitoring, then disconnect at home.
-
Can I connect to multiple VPN servers at once?
No, not with a single VPN account. You connect to one server at a time. Connecting to a new server disconnects you from the previous one. Some advanced users chain VPNs, but that’s complex and unnecessary for beginners.
-
What’s the difference between connecting to different servers?
Different servers are in different locations (countries/cities). Connecting to a US server makes websites think you’re in the US. Nearby servers are faster; distant servers add more latency. Choose based on speed preference and location needs.